Friday, December 20, 2013

WINTER SCEEN JAR PROJECT

I couldn't wait to do this fun project on a quiet evening whilst watching a corny Christmas movie. Over the last cpl weeks I've been gathering little things from here and there. Mostly dollar store finds and things I already had. What's great about this is there are no rules.
I was inspired by a few similar projects using mason jars in pinterest. I had mason jars but found that the lids left very little room room to play with. So when I saw these larger cylindrical jars with wide lids at the $$ store I was thrilled!
I got 2 large ones, 1 medium one and I had the small one already. This is most of the things I used...
If you have xmas village figurines from an old village set or find them at a garage sale. Even small Barbie pieces could be used, your imagination is the guide! Most of mine are from the dollar store, but the top jar has some glass pieces I got last week for next to nothing. Two of my jars have a battery operated  street lamp. The wires are very little so I was able to carefully screw the tops while letting the wires to come out. The battery pack is hidden on the plate under the xmas balls I surrounded the bottom with. I shopped the rest around the house, like some candlesticks, tea light holder etc.......
TRIAL & ERROR!
  Even the simplest of my project, ALWAYS teach me something !
So as I started to assemble my things together, I happily glued my little scenes on the underside of the lids. All excited to put the glass jars onto them...to find that after all that, my scenes were too deep in relation to the height of the lids. It still worked but I wanted to improve on it.
  My glue hadn't totally set so I removed everything to start again. Thankfully I keep everything, and after rummaging in the garage, I found some little pieces of scrap wood in a jar. I glued those to the lids THEN glued the figurines onto the little bocks, so they would sit much higher then previously...added more snow to hide the blocks and Voila...the scenes sit higher in the jars.
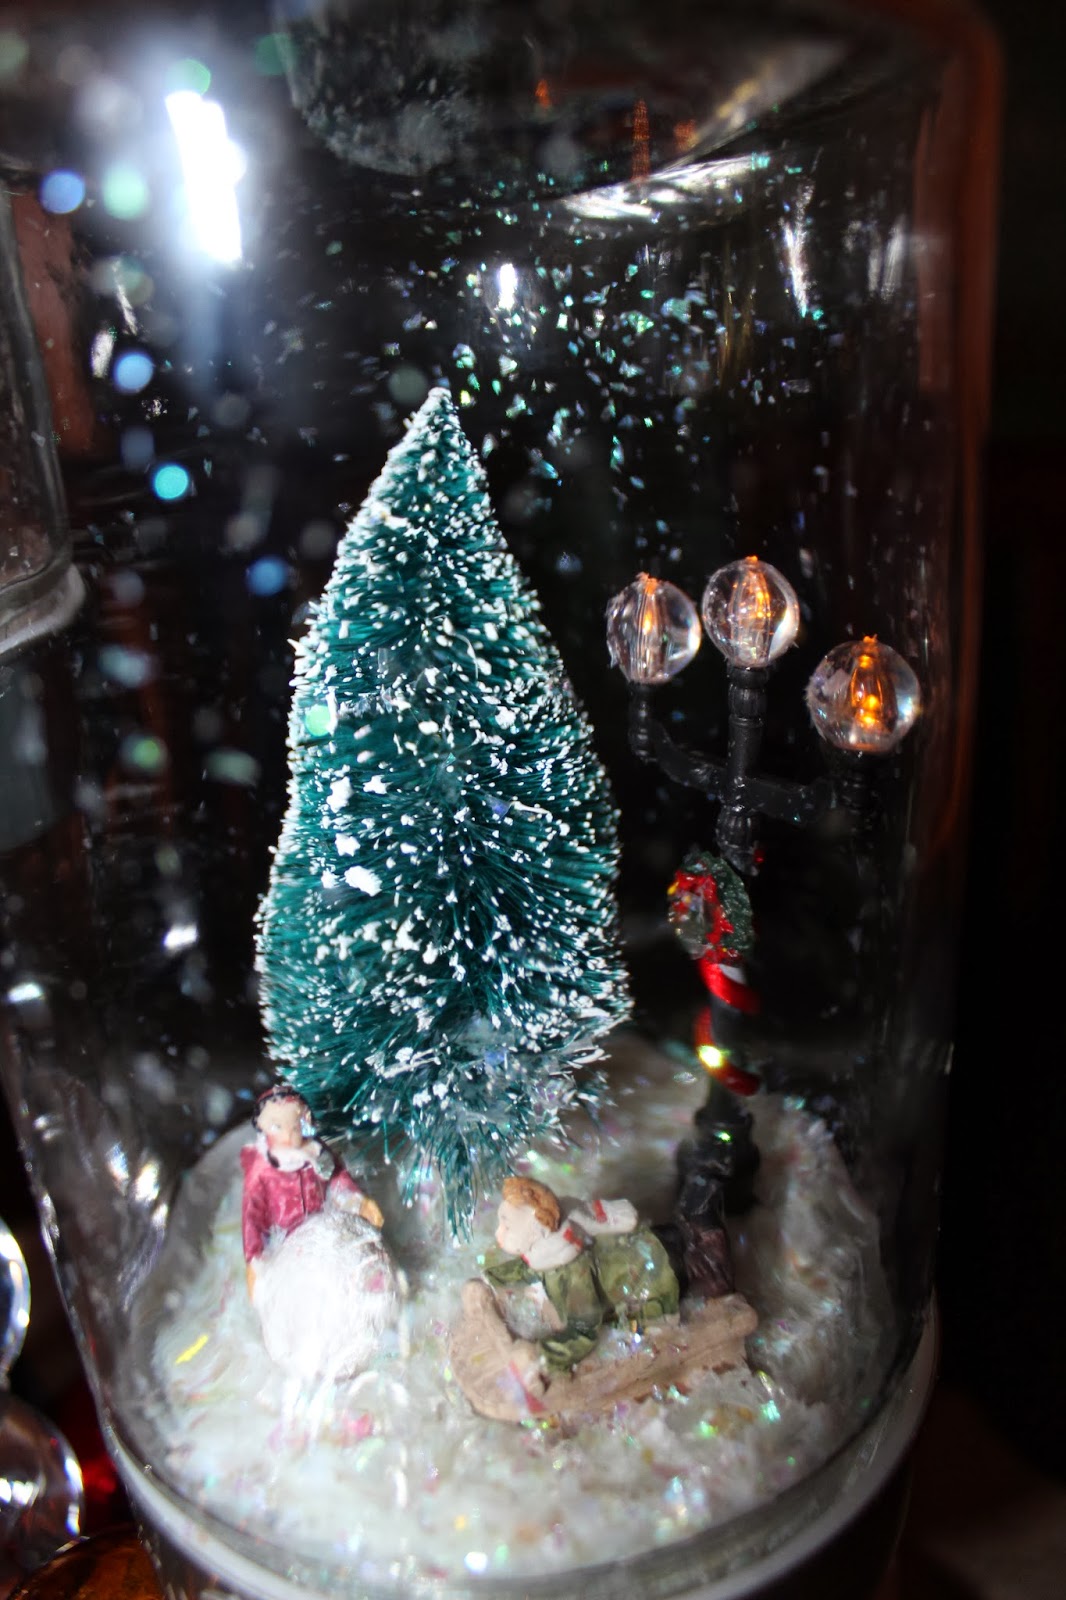


The little lights don't shine bright, but they are cute nonetheless ...


This is a great project to do with children...I know the little girl in me loved every minute of playing with this!!
HAVE FUN!

Tuesday, July 23, 2013

Fire Fly Lanterns , To Glow or Not to Glow?

Last yr I decided to spruce up our garden shed...One of the things I wanted to do was an idea I had seen with hanging mason jars. I was fortunate a few days later, to happen upon a big liquidation sale!! (Yeah, like that happens! ZELLERS was closing so I rushed over there!) I scored these metal lanterns on clearance for 1/4 of their price...so I got 4 Med sized ones for $5 each! to hang at each corner of our Gazebo and one Large one for $10 to hang outside the shed.
 The idea was so simple. Get some moss...and hidden in amongst it a string of mini lights that are battery powered. I actually found some at the dollar store. I loved how they looked...but only every turned them on when we had company. Batteries are pricey and they don't last long. I did love how they looked when lit. ...But.......
and there's always a But.....Daytime, when not lit, Some...ok....many ppl had to inquire why the hell I had green stuff packed in my lanterns! To which I would answer....."SSHHHHHHH u will wake my fireflys! They like to sleep in there!"
Needless to say, I wanted to retire those "FireFlies" for good!
I also wanted a better source of light or glow this time that cost less then batteries...
I love Pinterest! and I saw the perfect idea by CakeryPapery.com ! So this spring I cleaned all the moss out of my lanterns and put the lights away for some future project ..maybe....
First, I found a cute stencil with 4 different Fireflys on it...Stenciled the outside panels with black paint so they would show up against the bright sparkle I planed for the inside....
I got some inexpensive glitter (any colour u want) I used bright silver and white mixed together. I mixed
 2 tbsp of Elmer's glue with 1 tbsp water...(u can make it thinner if u want) I brushed glue on inside panels then generously sprinkled glitter on them...Hung in their places to dry...Place Tea Lites in and Voila!  Low cost and they last a few hrs! My larger one holds a larger candle...and we can see it from across the yard! 

Yes, I love lanterns and Candles! I also love how these turned out...the 4 I put in the Gazebo all glow as much as the shed one AND they look pretty during the day also!! Win Win....

What do you think? Which do u prefer?

Sunday, July 07, 2013

PreLoved to ReLoved!

We found this adorable log table set at a Garage Sale a few weeks ago. Actually, I spotted one of the little benches first and loved it!My 1st thought was that it looked like a Hobbit's bench to me...When I asked the price, the lady said it belonged to a whole set, as she pointed towards a round table and the other 3 benches with a sticker price of a whopping $30...SOLD!

Now normally I love to haggle but sometimes even I know a darned good deal with I see it! We were lucky because the lady was willing to keep the set until Monday as we were 3 hrs from home. It was our weekend away in Quebec City..and having to cart that set in our vehicle over the weekend would have been cumbersome to say the least!..
I was hoping to find a project that would allow me to use some of the left over paint we had from painting our Deck last Spring. This was just Perfect for that!! I Sanded the tops with a power sander...Nothing fancy as this set will remain outdoors..
And so it begins....Dark Grey for the legs...
Now, I realize this may look weird...just bare with me...I have a plan......and btw, the shutters are for another project to come lol...
This is isn't the panel I used for this project....the ones I did use still had wet paint on them...Basically, it's the same as this one,with different shapes...I used them as a stencil...To make it look kind of like there was a Lace tablecloth on the table ...I painted the edges and parts of the pieces with left over black paint....
So with the panels/stencils in place on the table, on the areas I painted the lighter grey...I then used a can of Black Spray paint to spray over all...and thought the benches would look cute with some random lace on them also...I plan to take a sanding block to the edges here and there to distress it a bit tomorrow...I just couldn't wait until then to post some photos of this set....I have a little parasol I can stick in there for some shade also! What do u think of my quaint Hobbit Set?